Beginner course on Nodejs
We will cover a wide range of topics from history of Nodejs to deploying it on heroku.

Pre requisites:
- Basic knowledge of javascript and html.
Table of contents:
- Introduction to Nodejs
- What is server and client
- History of Nodejs
- Introduction to expressjs, package.json and npm.]
- Few Built in modules (path and fs)
- Server side rendering vs Client side rendering
- Rendering html files
- Nodemon npm package
- Serving css, media and javascript
- Git - Server side rendering and data handling
- Middlewares and intro to morgan npm package
- Getting data from client
- Passing data to html using ejs tempate engine
- Media handling using formidable npm package
- Introduction to databases and NoSQL vs SQL - REST API building and deployment
- REST vs SOAP
- Types of API calls.
- Building REST API with postgresql and sequalize npm package.
- Introduction to postman.
- Building REST API with mongodb and mongoose npm package.
- Deploying to heroku.
- Security concerns and introduction to helmet npm package.
- Things to consider while designing web applications.
- Few concept recommendations
➡️ Before starting the actual content, let me tell you how usefull web technologies are. It started with local physical connections among computers which enabled users to interact with other computers in the network. Now its not limited to local connection, any computer or device with internet connectoin is able to connect to the great network of computers. Internet is making amazing things possible. One greatest advantage i would like point here is,
We are building a great library to which anyone with internet connection has access to. Knowledge is open to all now. Lets learn and share.
Introduction to Nodejs
What is server and client
Lets start with the basics. You know that internet is a network of computers. Consider, in college John uploads new movies every saturday to his computer. Every other student can now access that movie with local connection they have setup. Here John’s computer is the server and rest of the computers thats trying to access the movie are clients. Remember this, server listens for requests. Client computers dont directly talk to the server. They use browsers to make requests.
Lets take one more real life example, we come to our browser and search for python in w3schools. Now browser makes request to remote(placed somewhere remotely) w3schools server and server serves the python related content back. To see all the interaction that takes place between a server and browser(client) open the network tab in your browser.

You can right click on your browser and click on inspect and then select network tab. In the right you can see all the data transfer that has taken place between browser and server.
History of Nodejs
You may already know what Nodejs is, I’ll try answering how Nodejs. I mean how it came into existence. Nodejs was created in 2009. Its very recent but it became very popular in web dev community. Browser understands only html, css and javascript. Its a standard set by w3c(world wide web consortium). Javascript used to work only on browsers. Ryan Dhal used chrome v8(javascript engine) to make javascript run even outside of browsers. Developers had to know two languages to build web apps. One for scripting on the server and another is javascript to add interactivity on the browsers. By the introduction of Nodejs, developers could do both with a single language. Community rushed in and developed Nodejs and other packages to bring Nodejs to where it is today. Nodejs has huge community and tons of packages which makes is so powerful. Lets dig in further…
➡️ Install Nodejs from the official site if you don’t have it already.
➡️ I’ll be using visual studio code as editor. You are free to use anything of your choice.
Introduction to package.json, npm and expressjs
Lets setup a basic server using Nodejs first. Go to where you want to create your project in your command line if you are on windows or terminal if you are on linux or mac. Type “npm init” command. It asks few questions hit enter for all. Or you can also pass a “-y” flag in the command. “npm init -y” will consider yes for all the questions.
It’ll create a package.json file. This is the cofiguration file for your nodejs project. All the packages installed and running scripts are included here. Now lets create a file called “index.js” which will be our main file.
var http = require('http');
http.createServer((req, res)=> {
  res.write('Hello World!');
  res.end();
}).listen(8080);
console.log('listening on port 8080')
Add the code and run. To run use “node index.js” command in your terminal (I’ll be referring as terminal to both cammand line and terminal from now on). Now the server is listening on port number 8080. Go to your browser and search “http://localhost:8080" in url bar. You can make server listen on any port number.
This was using the inbuilt nodejs module. But we will be using expressjs, a npm package which makes working with Nodejs lot easier. Lets install it now. “npm install express” will install it. Npm (node package manager) is a registry for nodejs packages. You can add your package there or install any existing packages from there for your projects. All the installed packages are stored in a folder called node_modules. A file named package-lock.json holds the details of installed packages. Package details are stored in package.json as well. Now lets setup the server with expressjs.
const express = require("express");
const app = express();app.get("/", (req, res) => {
  res.send("Hello world");
  res.end();
});app.listen(8080, () => console.log("listening on port 8080"));
Above code is the expressjs version. It is listening on “/” that is the root path of the server. Every request from browser will have request parameters and response object. Using response object we can send data back to browser.

Few important built-in modules(path, fs)
Path module helps us to work with file or folder paths. It offers lot of methods but we will be only convering mostly used ones.
Path module
🟡 path.join()
This method allows us to join a sequence of strings and return a complete path using platform specific separator as delimeter.
const path = require("path");
let temp = path.join("some", "/something", "somefile.txt");
console.log("temp: ", temp);
OUTPUT:
node index.js
temp:  some/something/somefile.txt
🟡 path.resolve()
This method also works similar to path.join() but it considers the current directory as root directory. Path.join() just concats the strings but resolve returns the absolute path.
const path = require("path");
let temp = path.resolve("some", "/something", "somefile.txt");
console.log("temp: ", temp);
OUTPUT:
node index.js
temp:  /something/somefile.txt
Just logging path.resolve() gives our current abosolute path. You can use path.resolve() to add extra path to the absolute path.
const path = require("path");
let temp = path.resolve("somefile.txt");
console.log("temp: ", temp);
OUTPUT:
node index.js
temp:  /home/murali/Development/murali/training/nodejs/somefile.txt
You can see that we could add somefile to the actual path from home directory of the system. But path.join() cannot do that.
🗒️ “__dirname” is a node script which returns the current working directory. It can be used along with path.join() to get the same output as path.resolve().
const path = require("path");
let temp = path.join(__dirname, "somefile.txt");
console.log("temp: ", temp);
OUTPUT:
node index.js
temp:  /home/murali/Development/murali/training/nodejs/somefile.txt
➡️ You can get all the methods of path module here.
FS module
This module is very much used. This helps in reading and writing contents to and from files.
🟡 fs.readFile()
This method reads the contents of a file.
const fs = require("fs");
fs.readFile("test.txt", (err, data) => {
  if (err) return console.log("Error in reading file");
  console.log("data:", data.toString());
});
OUTPUT:
node index.js
data: hello world
The contents of the test.txt file was “hello world”.
🟡 fs.writeFile()
This method lets us write contents to the file. If the file doesn’t exit it’ll create one. If the file exists it’ll overwrite the contents. In the below code we are first writing the content and then re-reading it.
const fs = require("fs");
fs.writeFile("test.txt", "Hello world, write file", (err) => {
  if (err) return console.log("Error in writing file");
  console.log("file written succesfully");
});fs.readFile("test.txt", (err, data) => {
  if (err) return console.log("Error in reading file");
  console.log("data: ", data.toString());
});
OUTPUT:
node index.js
file written succesfully
data:  Hello world, write file
🟡 fs.appendFile()
This method allows us to append data to the file instead of overwriting it. If the file doesnt exist it’ll create new one.
const fs = require("fs");
fs.appendFile("test.txt", " Hello world, append file", (err) => {
  if (err) return console.log("Error in appending file");
  console.log("file appended succesfully");
});fs.readFile("test.txt", (err, data) => {
  if (err) return console.log("Error in reading file");
  console.log("data: ", data.toString());
});
OUTPUT:
node index.js
file appended succesfully
data:  hello world Hello world, append file
test.txt file had “hello world” text previously. Rest of the text are appended to it.
🟡 fs.unlink()
This method lets us delete a file. If the file doesnt exist it’ll throw and error.
const fs = require("fs");
fs.unlink("test.txt", (err) => {
  if (err) return console.log("Error in deleting file");
  console.log("file deleted succesfully");
});
OUTPUT:
node index.js
file deleted succesfully
Server side rendering vs Client side rendering
Ok… how does the contents we see in the browser gets generated in the first place. Lets go to w3schools site and see whats underneath the view we see in the browsers. Right click and select inspect, select elements tab and you will see the html part of the page. You can go to any site and see its html contents.
This html content which is responsible for generating the view can be generated in two ways. That is either on the server or on the browser. If the html genration happens on the server then its called as server side rendering. If that happens on the browser its called client side rendering. All the html and supporting files are served to the browser once and then based on user interaction html generation happens on the browser.
You should pick what to use when. Server side rendering is good for Search engine optimization. If the contents are rendered on the server, it easily comes to the attention of search engine crawlers. For example, when you make search request on “how to make cakes” on Google, its crawlers search every server for contents related to making cake and then give the results back to you in the browser. This is called as page ranking. There are lot of factors that affect page ranking, you can read more about SEO to understand them. But this is how server side rendering helps in getting your content to the users.
Well… why doesn’t client side rendering help in SEO?. Because crawlers can’t get the data that’s been rendered in the browser. Then what is the user of client side rendering?. If the view is changing very often, then client side rendering is a very good choice. Because you dont have to make new requests to the server every time a user changes some data. Example facebook, as the data keeps changing very often, somebody makes a new post it comes in your dashboard. In these situations client side rendering is better. Client side rendered applications are also called as single page applications. Whole content is served once and view changes based on user interaction at the browser itself. These applications renders html on the browser but cannot work entirely without server. It makes request to server to get just the data not the html. It gets the data from the server and renders the html and displays it. We will see how this data flow happens in further section.
Rendering html content
In the server we setup earlier, it was giving plain text as response. Now lets see how we can send html content.
const express = require("express");
const app = express();app.get("/", (req, res) => {
  res.send(`<h1 style="color:rgb(255, 0, 0)">Hello world</h1>`);
  res.end();
});app.listen(8080, () => console.log("listening on port 8080"));
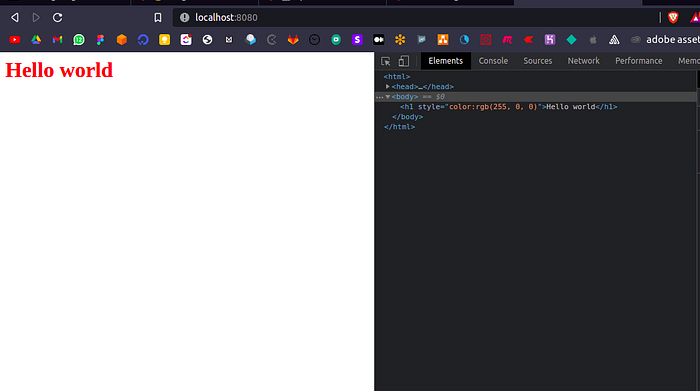
You can see we were able to serve html content. In the elements tab we can see the actual html content.
🗒️ Note: Frontend developers extensively use browsers dev tools for debugging. Make yourself comfortable here.
Serving html as a string isn’t enough right. Lets serve html content from separate html files. You can render html files by making use of “fs” module by reading the contents of html file but we will be using expressjs and ejs to do that in an easy way.
// rendering html from file
const express = require("express");
const ejs = require("ejs");
const app = express();app.set("view engine", "ejs");// set this to change default folder for html pages
// app.set("views", __dirname + "/pages");app.get("/", (req, res) => {
  res.render("index");
  res.end();
});app.listen(8080, () => console.log("listening on port 8080"));
Ejs and express keeps the syntax simple. First set the view engine to ejs. There are lot of other view engines(template engines) for nodejs but ejs is simle and powerful. By default ejs looks a folder named views but we set to something else aswell by setting views to some other folder. As done above.
⚠️ Note: Every time you make changes in the code you need to restart your server.
Nodemon
Nodemon is an npm package which allows us to restart the server every time we make changes to the code automatically. We need not stop and start the server every time we make some changes.
“npm install — save-dev nodemon” will install nodemon as dev dependency. That is it it’ll only be used in development not in production. It’ll be saved as a devDependency in package.json.
Serving css, images and javascript files
We have rendered a single html file till now. For a website we will be needing css, medias and javascript files. Lets see how to send that to the client now.
const express = require("express");
const ejs = require("ejs");
const app = express();app.set("view engine", "ejs");
app.use(express.static("public"));app.get("/", (req, res) => {
  res.render("index");
  res.end();
});app.listen(8080, () => console.log("listening on port 8080"));
We have just added one line. “app.use(express.static(“public”))” this line says that to look for all the static files within a folder named public.
<!DOCTYPE html>
<html lang="en">
  <head>
    <meta charset="UTF-8" />
    <meta http-equiv="X-UA-Compatible" content="IE=edge" />
    <meta name="viewport" content="width=device-width, initial-scale=1.0" />
    <link rel="stylesheet" href="css/index.css" />
    <title>Nodejs course</title>
  </head>
  <body>
    <div class="container">
      <div>
        <img
          src="images/node-img.png"
          alt="node-logo"
          width="200"
          height="auto"
        />
        <h2 style="margin: 5px">Counter example</h2>
        <h1 id="counter">0</h4>
        <button id="counter-btn">Increment</button>
      </div>
    </div><script src="js/index.js"></script>
  </body>
</html>
Above is the modified index.ejs file. You can see we have added css , image and js files.
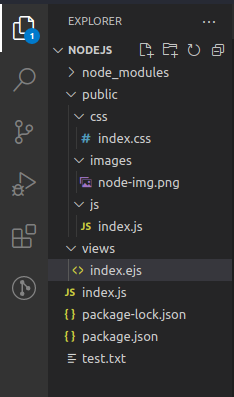
You can get the idea on how the files are placed within public folder. Path you give in the html file should consider public folder as its root. For example for css file we have given “css/index.css” as the path in html.
Css File
.container {
  padding: 10px;
  border-radius: 10px;
  background-color: burlywood;
  display: flex;
  align-items: center;
  justify-content: center;
}
Javascript File
let counterButton = document.getElementById("counter-btn");
let counter = document.getElementById("counter");
let count = 0;
counterButton.addEventListener("click", () => {
  console.log("Incrementing count by 1");
  counter.innerText = count += 1;
});
Git
Git is very important in code maintanance. Lets initialise a git repository and add all the files. Git is huge to learn but we will be using mostly used commands to get started. Learn more about git here. Install git if you don’t have it already from here.
- “git init” initialises a git repository.
- “git add .” adds all the files to git staging area.
- “git commit -m ‘commit message’ ” commits your staged files, commit message is orbitrary, insert an explanation that makes more sense.
- “git status” displayes how many files are modified and how many are staged.
- “git logs” lists all the commits
Server side rendering and data handling
Middlewares and intro to morgan
Middlewares access and request data first and then send it to the actual routes for them to handle. Middlewares applications can be to just print the request timings or to authenticate the user request. Lets see how we can build a custom middleware.
const express = require('express')
const app = express()const timeLogger = (req, res, next)=>{
    console.log('Time:', new Date())
    next()
}
app.use(timeLogger)app.get('/', (req, res) =>{
    console.log('get request in route')
    res.write('hello world')
    res.end()
})app.listen(8080, ()=>console.log('listening on port:', 8080))
OUTPUT:
listening on port: 8080
Time: 2021-07-23T19:17:57.400Z
get request in route
The timeLogger function is the middleware here. Before going to the actual get route, request data passes through the timeLogger middleware. In the above output you can see that first the time is logged and then the “get request in route” text is logged. next() function lets the request go further. Without calling next() the request will not reach the actual get request. To use a middle you just put in into app.use().
Morgan is logger, it logs all the requests that the server gets. Using this as an example lets see how to use an external middleware. You can refer to morgan documentation to see all the options it provides.
const morgan = require('morgan')
app.use(morgan("dev"))
Getting data from the client
We have seen how to render html content. Now lets see how to save data in the backend sent from the browser. Lets setup routes in the backend first.
const express = require("express");
const app = express();app.use(express.urlencoded({ extended: true }));app.set("view engine", "ejs");
app.use(express.static("public"));let todos = [];app.get("/", (req, res) => {
  res.render("todo");
  res.end();
});app.post("/", (req, res) => {
  let { body } = req;
  console.log("body from html:", body);
  todos.push(body.todo);
  console.log("todo:", todos);
  res.redirect("/");
});app.listen(8080, () => console.log("listening on port 8080"));
app.get serves the html file. app.post listens for post requests from the browser. req.body is an object with form element values from html. res.redirect redirects to the “/” route which serves html content.
<!DOCTYPE html>
<html lang="en">
  <head>
    <meta charset="UTF-8" />
    <meta http-equiv="X-UA-Compatible" content="IE=edge" />
    <meta name="viewport" content="width=device-width, initial-scale=1.0" />
    <link rel="stylesheet" href="css/index.css" />
    <title>Nodejs course</title>
  </head>
  <body>
    <div class="container">
      <div>
        <h1 style="text-align: center">Todos</h1>
        <form action="/" method="POST" style="margin: 5px">
          <input
            type="text"
            id="todo-input"
            placeholder="enter the todo"
            name="todo"
          />
          <input type="submit" value="Submit" />
        </form>
      </div>
    </div>
    <script src="js/index.js"></script>
  </body>
</html>
Above html has form element which sends post request to the “/” route.
Adding data into html using ejs template engine
ejs is one the node template engines. Template engines help us embed data and construct html before sending it to the browser.
<%'Scriptlet' tag, for control-flow, no output<%=Outputs the value into the template (HTML escaped)%>Plain ending tag
Write the javascript and wrap each line with those angle brackets. You can learn more about ejs here.These are the tags we will be using and mostly enough.
We saw how we can get data from browser, now lets see how to generate html based on the data in backend.
const express = require("express");
const ejs = require("ejs");
const app = express();app.use(express.urlencoded({ extended: true }));app.set("view engine", "ejs");
app.use(express.static("public"));let todos = [];app.get("/", (req, res) => {
  res.render("todo", { todos });
  res.end();
});app.post("/", (req, res) => {
  let { body } = req;
  console.log("body from html:", body);
  todos.push(body.todo);
  console.log("todos:", todos);
  res.redirect("/");
});app.listen(8080, () => console.log("listening on port 8080"));
We can pass values to html as a second parameter to render function. We are passing an object with key as todos and value as the variable todos. Now we can access the value from within html using todos variable.
<!DOCTYPE html>
<html lang="en">
  <head>
    <meta charset="UTF-8" />
    <meta http-equiv="X-UA-Compatible" content="IE=edge" />
    <meta name="viewport" content="width=device-width, initial-scale=1.0" />
    <link rel="stylesheet" href="css/index.css" />
    <title>Nodejs course</title>
  </head>
  <body>
    <div class="container">
      <div>
        <h1 style="text-align: center">Todos</h1>
        <form action="/" method="POST" style="margin: 5px">
          <input
            type="text"
            id="todo-input"
            placeholder="enter the todo"
            name="todo"
          />
          <input type="submit" value="Submit" />
        </form>
        <div>
          <% todos.length && todos.map(todo =>{%>
          <ul>
            <%=todo%>
          </ul>
          <%}) %>
        </div>
      </div>
    </div>
    <script src="js/index.js"></script>
  </body>
</html>
We have added an extra div which loops over the todos array and list the items.
Media handling using formidable npm package
Formidable is an npm package for formdata handling. Lets see how to upload media using it.
const express = require("express");
const app = express();
const formidable = require("formidable");
const fs = require("fs");
const path = require("path");app.use(express.urlencoded({ extended: true }));app.set("view engine", "ejs");
app.use(express.static("public"));app.get("/", (req, res) => {
  res.render("mediaupload");
  res.end();
});app.post("/upload", (req, res) => {
  let form = new formidable.IncomingForm();
  form.parse(req, (err, fields, files) => {
    if (err) return console.log("Error in parsing formdata");
    var oldpath = files.files.path;
    var newpath = path.resolve("media", files.files.name);
    fs.rename(oldpath, newpath, (err) => {
      if (err) return console.log("Error in saving file");
      console.log("File uploaded succesfully");
      res.redirect("/");
    });
  });
});app.listen(8080, () => console.log("listening on port 8080"));
In the “/” route we are serving the html file to upload media file. We are caching that form data in the “/upload” route. Formidable works very well where formdata is involved. There are other media upload packages as well. But formidable is simple and works great with form data. You can see a practical use of path.resolve() method. fs.rename() is saving the file.
<!DOCTYPE html>
<html lang="en">
  <head>
    <meta charset="UTF-8" />
    <meta http-equiv="X-UA-Compatible" content="IE=edge" />
    <meta name="viewport" content="width=device-width, initial-scale=1.0" />
    <title>Nodejs course</title>
  </head>
  <body>
    <form action="/upload" enctype="multipart/form-data" method="post">
      <input type="file" name="files" />
      <input type="submit" value="Upload" />
    </form>
  </body>
</html>
We have added form element with enctype=”multipart/form-data”, On submitting the form request hits the /upload route and formidable takes care of saving the file to media folder.
Introduction to Databases and SQL vs NoSQL
So far we saved data into an array on backend. When the system reboots that data is going to be lost. We can store in in a file that would be persistent but thats alright for small data. But what if you want to store large data and get the data quickly. Here comes the databases. There are different types of databases based on type of data they store and their applicaiton. We will be convering SQL and NoSQL databases. Lets see the difference between them first.
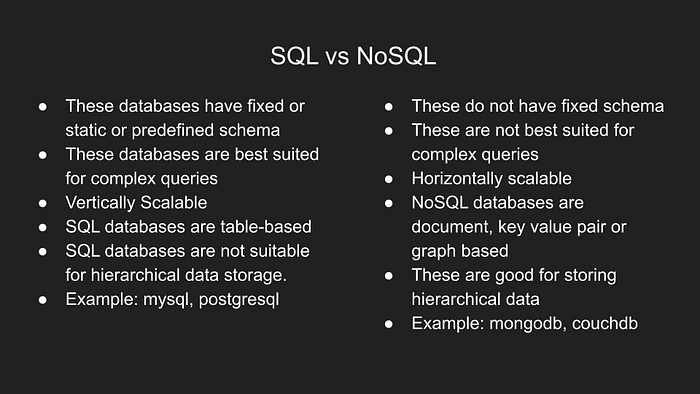
NoSQL stands for “Not Only Structured Query Language” SQL stands for “Structured Query Language”. NoSQL db are used when dealing with unstructured data. That is if you dont know the exact structure of data. SQL have fixed schema like login credentials. Username and password is a fixed schema. This data is structured. NoSQL can also be used for structured data, along with that it enables us to handle unexpected data aswell.
Vertical scalling means by increasing the hardware resources you can improve the performance. In Horizontal scalling building more sever instances improves the performance.
SQL stores data in form of tables with columns and rows. NoSQL stores data in the form document or key value pairs.
REST API bulding and deployment
REST API vs SOAP

Types of API calls
GET: gets the data from the server
POST: sends data to the server
PUT: updates the data
PATCH: updates a single value
DELETE: deletes data
These are the types of calls we make to the server. Based on that server responds appropriately.
Building REST API with postgresql and sequelize
We will see how to create CRUD API with postresql and sequelize. CRUD means “Create Read Update Delete”. We are going to build API for managing todos.
Sequelize is an ORM for SQL databases for nodejs. ORM stands for Object Relational Mapper. It provides an api in native language for interacting with SQL databases. You can change the databases whithout making changes to your code. This is the advantage of ORM.
Lets install sequelize: “npm i sequelize”
We will be using environment variables. We should not share confidential information like database passwords or api keys in github. If we add that in the environment variable and ignore the file, credentials will be safe. We will be using dotenv npm package. It’ll load the environment variables into node project. Install dotenv package.
We are not going to see how to setup the postgres database here, we will focus on nodejs. Assuming you have a postgres database running on your system, lets get started.
We are going to use sequelize-cli for creating tables and performing migrations. You need not install it we are going to use npx for that. npx installs a version of the package for the first time automatically. Lets see how to use that in a bit.
npm i express dotenv sequelize pg pg-hstore Along with sequelize we are installing pg and pg-store packages. They are required for sequelize to work with postgres. Refer to the documentation for dependencies for other databases.
Lets setup the express server with environment variables. For assigning environment variables you have to create a .env file and add variables there. require the dotenv module at the top of the js file to access its values using process.env.
require("dotenv").config();
const express = require("express");
const app = express();
const PORT = process.env.PORT || 8080;app.listen(PORT, () => {
  console.log("Server listening on PORT:", PORT);
});
You can see we are requiring dotenv and accessing the PORT from .env file in the index.js file. Lets see what we have in .env file
USER_NAME=admin
PASSWORD=password
HOST=127.0.0.1
DIALECT=postgres
DATABASE=nodejs_training
PORT=8080
Above are the contents of the .env file.
USER_NAME: Username of the postgres database
PASSWORD: Password of the postgres database
HOST: Where the database is hosted. In our case it is localhost.
DIALECT: Type of database. In our case it is postgres.
DATABASE: Name of the database we are working with.
PORT: This is the port in which our server is listening to.
⚠️ NOTE: Dont use quotation marks for string in .env file. And make sure the variables names are not conflicting with system environment variables. For example USERNAME will give the system username instead of what we provide in the .env file.
sequelize-cli will do the basic database setup for us automatically. “npx sequelize-cli init” will do that for us . Find the documentation and detals here.


Config.json file holds all the database configuration details. If we push the file to github it will be visible to public which we dont want. So lets create a new file called config.js which provides all the database configuration we need.
// const config = require(__dirname + '/../config/config.json')[env];
const config = require(__dirname + "/../config/config.js");
⚠️ You need to make one line change in “models/index.js” file. Comment the existing require line pointing config.json file and make it point to config.js. Without this configuration following steps wont work.
Creating tables
npx sequelize-cli model:generate --name Todo --attributes title:stringAbove command will generate the code for a todo table for us. You can find all the functions that sequelize-cli provides from here.
— name: name of the table, keep is singular.
— attributes: columns in the table.
Two files will be created. One in migrations folder and one in models folder. Till now table is not actually created in the database. We have just generated the code to create table.
⚠️ NOTE: Migration is a very important concept while working with sql databases. Only on running migration database structure is changed. From the above case just running model:generate will not generate a table in database. You should run the migration. Every time you make some change to your model file you need to run migrate for changes to take place in database.
npx sequelize-cli db:migrateSequelize CLI [Node: 14.17.2, CLI: 6.2.0, ORM: 6.6.5]Loaded configuration file "config/config.js".
== 20210725092332-create-todo: migrating =======
== 20210725092332-create-todo: migrated (0.017s)
Above command performs migration. You can see the output it has printed.

SequelizeMeta: this table holds all the details about migrations
Todos: this table is what we created.
End of database setup. Now we can go ahead and build the APIs. We will few middlewares which you should use in all the projects.
app.use(cors({ origin: `http://localhost:${PORT}` }));
app.use(helment());
app.use(express.json());
app.use(express.urlencoded({ extended: true }));
app.use(morgan('dev'));cors: you can control from which host you get requests from. Iam saying to allow requests from localhost here.
helmet: Provides security headers(more detail in the below section).
express.json(): parses json data coming from client.
express.urlencoded(): parses data present in the url.
morgan(‘dev’): Its the logger we saw earlier.
Obviously dont forget to install them.
require("dotenv").config();
const express = require("express");
const helment = require("helmet");
const cors = require("cors");
const morgan = require("morgan");
const app = express();
const { Todo, sequelize } = require("./models");
const PORT = process.env.PORT || 8080;app.use(cors({ origin: `http://localhost:${PORT}` }));
app.use(helment());
app.use(express.json());
app.use(express.urlencoded({ extended: true }));
app.use(morgan('dev'));app.get("/todos", async (req, res) => {
  try {
    let todos = await Todo.findAll();
    res.status(200).json({
      isSuccesful: true,
      items: todos,
    });
  } catch (error) {
    console.log("Error in getting all todos");
    res.status(500).json({
      isSuccesful: false,
      error,
    });
  }
});app.listen(PORT, () => {
  sequelize
    .authenticate()
    .then(() => {
      console.log("connected to database");
      console.log("listenign on port: ", PORT);
    })
    .catch((err) => console.log("Error in connecting to database"));
});
We have added a GET route. In Import we are requiring Todo table and sequelize from models folder. In app.listen() we are verifying whether the server is connected to the database or not.
async() and await are required as it is asyncronous. Get more details on async functions from here. In short functions which take time to execute are called as asyncronous functions. await waits for that function to get completed and only then the execution flow goes to the next line. Todo.findAll() gets all the todos present in the database. Get to know all the query methods provided by sequelize here.
⚠️ NOTE: If we are requiring a file named index we need not mention it. In the above import of Todo and sequelize we are just passing the path till models folder. It automatically imports from index file.
Introduction to postman

Postman is an API testing tool. We are going to use this tool to test our API’s. Lets also see how to create API documentation while we are at it.
Ill first create a collection named nodejs-training. Give whatever you want. Click on the options on the collection we just created and select Add request to add a new request. Give that new request a name. Ill name it as get todos because this request is for getting the todos. Make sure to run the server and then…

You can see above that we are making a GET request to http://localhost:8080/todos. In the bottom area you can see the response from the server. Its giving items as empty array. Because we dont have any todos in the database.
nodemon index
[nodemon] 2.0.12
[nodemon] to restart at any time, enter `rs`
[nodemon] watching path(s): *.*
[nodemon] watching extensions: js,mjs,json
[nodemon] starting `node index index.js`
Executing (default): SELECT 1+1 AS result
connected to database
listenign on port:  8080
Executing (default): SELECT "id", "title", "createdAt", "updatedAt" FROM "Todos" AS "Todo";
GET /todos 200 9.909 ms - 31
The above is the loggings on the server end. You can see the logs printed by morgan. Lets create other routes to handle, create, update and delete requests.
app.get("/todos/:id", async (req, res) => {
  let { id } = req.params;
  try {
    let todo = await Todo.findOne({ where: { id } });
    res.status(200).json({
      isSuccesful: true,
      item: todo,
    });
  } catch (error) {
    console.log("Error in getting the todo");
    res.status(500).json({
      isSuccesful: false,
      error,
    });
  }
});app.post("/todos", async (req, res) => {
  let { title } = req.body;
  try {
    let todo = await Todo.create({ title });
    console.log("Newly created todo:", todo);
    res.status(200).json({
      isSuccesful: true,
      item: todo,
    });
  } catch (error) {
    console.log("Error in creating todo");
    res.status(500).json({
      isSuccesful: false,
      error,
    });
  }
});app.delete("/todos/:id", async (req, res) => {
  let { id } = req.params;
  try {
    let todo = await Todo.destroy({ where: { id } });
    res.status(200).json({
      isSuccesful: true,
      item: todo,
    });
  } catch (error) {
    console.log("Error in deleting the todo");
    res.status(500).json({
      isSuccesful: false,
      error,
    });
  }
});app.put("/todos/:id", async (req, res) => {
  let { id } = req.params;
  let { title } = req.body;
  try {
    let todo = await Todo.update({ title }, { where: { id } });
    res.status(200).json({
      isSuccesful: true,
      item: todo,
    });
  } catch (error) {
    console.log("Error in updating the todo");
    res.status(500).json({
      isSuccesful: false,
      error,
    });
  }
});
These are the rest of the API routes. As you saw in the types of API calls, we are creating different routes to handle different types of requests.
Todo.findAll(): gets all the todos
Todo.findOne({where: {id}): finds the todo with that id
Todo.create({title}): creates todo with passed title.
Todo.destroy({where:{id}): deletes the todo with id specified.
Todo.update({title},{where:{id}): updates the todo with new title using id.
⚠️ NOTE: whrere:{id} can be used to target any particular item. Here we are using id to do that. Because that is unique for each todo. You can also search for a particular todo using its title using string comparision. Which is an advanced stuff. Refer the sequelize docs for all the query option.
To target a particular todo we are passing the id of the todo in the url.
http://localhost:8080/todos/id
We can access the id within our route using req.params.id. id is an orbitrary value. You can pass any variable from the postman and access it here using that variable name.
Create all the requests in postman for the remaining API and test all.
You can download my postman collection from here. You can import this collection into postman and use it.

Building REST API with mongodb and mongoose
Fow working with mongodb ill be using remote database. You can also create one for free by logging into mongodb atlas. First lets configure the environment variables.
PORT=8080
MONGODB_URI=mongodb access uri
Add your mongodb access uri as value to MONGODB_URI. Packages that we will be using for working with mongodb is mongoose. Its an ORM for mongodb. Here we will be creating the model. In models folder create a file named todoModel.js and the follwing content.
const mongoose = require("mongoose");
const Schema = mongoose.Schema;const todoModel = Schema(
  {
    title: { type: String, trim: true, required: true },
  },
  { timestamps: true }
);module.exports = mongoose.model("Todo", todoModel);
Schema and model are same. Now we can access this model from other files to perform CRUD on this todo collection.
require("dotenv").config();
const express = require("express");
const helment = require("helmet");
const cors = require("cors");
const morgan = require("morgan");
const mongoose = require("mongoose");
const app = express();
const Todo = require("./models/todoModel");
const PORT = process.env.PORT || 8080;
const MONGODB_URI = process.env.MONGODB_URI;app.use(cors({ origin: `http://localhost:${PORT}` }));
app.use(helment());
app.use(express.json());
app.use(express.urlencoded({ extended: true }));
app.use(morgan("dev"));app.get("/todos", async (req, res) => {
  try {
    let todos = await Todo.find();
    res.status(200).json({
      isSuccesful: true,
      items: todos,
    });
  } catch (error) {
    console.log("Error in getting all todos");
    res.status(500).json({
      isSuccesful: false,
      error,
    });
  }
});app.get("/todos/:id", async (req, res) => {
  let { id } = req.params;
  try {
    let todo = await Todo.findById(id);
    res.status(200).json({
      isSuccesful: true,
      item: todo,
    });
  } catch (error) {
    console.log("Error in getting the todo");
    res.status(500).json({
      isSuccesful: false,
      error,
    });
  }
});app.post("/todos", async (req, res) => {
  try {
    let todo = await new Todo(req.body);
    todo
      .save()
      .then(() => {
        console.log("Newly created todo:", todo);
        res.status(200).json({
          isSuccesful: true,
          item: todo,
        });
      })
      .catch((err) => {
        console.log("Error in creating new todo");
        res.status(500).json({
          isSuccesful: false,
          error,
        });
      });
  } catch (error) {
    console.log("Error in creating todo");
    res.status(500).json({
      isSuccesful: false,
      error,
    });
  }
});app.delete("/todos/:id", async (req, res) => {
  let { id } = req.params;
  try {
    let todo = await Todo.findByIdAndDelete(id);
    res.status(200).json({
      isSuccesful: true,
      item: todo,
    });
  } catch (error) {
    console.log("Error in deleting the todo");
    res.status(500).json({
      isSuccesful: false,
      error,
    });
  }
});app.put("/todos/:id", async (req, res) => {
  let { id } = req.params;
  let { title } = req.body;
  try {
    let todo = await Todo.findByIdAndUpdate({ _id: id }, req.body, {
      new: true,
    });
    res.status(200).json({
      isSuccesful: true,
      item: todo,
    });
  } catch (error) {
    console.log("Error in updating the todo");
    res.status(500).json({
      isSuccesful: false,
      error,
    });
  }
});mongoose
  .connect(MONGODB_URI, {
    useNewUrlParser: true,
    useUnifiedTopology: true,
  })
  .then((result) => {
    console.log("Connected to database");
    app.listen(PORT, () => console.log(`listening on ${PORT} `));
  })
  .catch((err) => console.log("Error in DB connection:", err));
Index.js file will look like this. No changes from the index.js while working with sequelize. Few line changes are there in connecting to the database and then performing queries on the database.
Todo.find(): gets all the todos from db
Todo.findById(id): finds the todo with the id
new Todo(todo) and then save(): creates new todo
Todo.findByIdAndDelete(id): deletes the todo
Todo.findByIdAndUpdate({_id:id}, req.body, {new:true}): updates the todo by using id
These lines are the only difference from sequelize to mongoose. Rest of the code is same. Without any change in the postman collection you can test the new API.
Deploying to heroku
Heroku is a platform where you can host your applications. We are going to host mongodb API we just built to heroku. In the dashboard create a new app and follow the deploy procedure.
You need to add a file named Procfile with content web: node index.js

Follow the steps provided one by one. First you need to install heroku cli and git. Once you follow all those steps your application will be deployed and from top right corner open app button you can open your deployed application. It’ll not display any data untill we append /todos to the end of the url. Becuase server is not listening on just / its listening on /todos.
Helmet npm package
Helmet protects our service by setting few security headers. In production app its a very good thing to have helmet.
app.use(helmet.contentSecurityPolicy());
app.use(helmet.dnsPrefetchControl());
app.use(helmet.expectCt());
app.use(helmet.frameguard());
app.use(helmet.hidePoweredBy());
app.use(helmet.hsts());
app.use(helmet.ieNoOpen());
app.use(helmet.noSniff());
app.use(helmet.permittedCrossDomainPolicies());
app.use(helmet.referrerPolicy());
app.use(helmet.xssFilter());
These are all the types of headers we can configure.
Things to consider
- Choose the tech stack based on project requirements. You cannot solve all the problems using a single package or framework. Choose accordingly.
- Writing test cases helps in the long run.
- Project documentation is very important. We may look back at our code and say why did i do this.
- Implement logging for the service and monitor production system. Logs help in debugging easily and you don’t want any downtime.
- Using git is must, it makes work easier and maintains code.
- Use docker, its makes shifting applications lot easier. You can spend more time developing rather than configuring your environment.
Future concept recommendations
- Learn Nextjs and Gatsby. Nextjs is good for server side rendering and Gatsby for static site generation. Reactjs is amazing as a template engine.
- Socket.io, bcrypt, nodemailer, node-cron, passportjs are few useful npm packages. Check them out .
- Learn any cloud solution. Preferably AWS, It provides tons of services. And again choose the stack based on requirement.
- Getting comfortable with a bit of linux commands is very useful.
- Getting to know networking concepts like how http works or any other network protocol works can make you build secure solutions. As web technologies are growing cyber security will also grow. Having knowledge on web security will help a lot in designing secure solutions.
Hope this content was of some use to you
Thank yourself for learning something new
Stay curious… Stay cretive…